A diesel injector problem rarely begins with a complete engine failure. It usually shows up as hard starting, uneven idle, black smoke, rising fuel use, loss of power, or a generator that no longer carries load cleanly. Knowing how to service diesel injectors helps maintenance teams respond before poor combustion causes more expensive damage to pistons, turbochargers, fuel pumps, or exhaust components.
For fleet trucks, generators, construction equipment, and industrial engines, injector service is not simply a cleaning task. Modern fuel systems operate at extremely high pressure and require clean working conditions, correct test equipment, approved parts, and precise calibration. The right approach depends on the injector type, engine condition, fault codes, and the quality of fuel that has been running through the system.
Start With Diagnosis Before Removing Injectors
Do not remove injectors based on smoke or poor performance alone. Similar symptoms can come from restricted air filters, turbocharger faults, fuel supply restrictions, low compression, contaminated fuel, incorrect valve timing, or electronic control issues. Replacing or servicing injectors without confirming the fault can add downtime without solving the problem.
Begin with a visual inspection of the fuel system. Check for external leaks, damaged fuel lines, loose electrical connectors, water in the fuel filter, and signs of injector blow-by around the cylinder head. A black, sticky deposit around an injector base often indicates combustion gas escaping past the sealing washer. This condition can damage the injector seat and make removal more difficult.
For electronically controlled engines, use the correct diagnostic tool to read active and stored fault codes. Review rail-pressure readings, cylinder balance data, injector correction values, and commanded versus actual fuel pressure. An injector with an abnormal correction value may be contributing to rough operation, but the result should be confirmed through further testing.
A proper diagnosis may also include a return-flow test, sometimes called a leak-off test. This compares the amount of fuel returned by each injector. Excessive return flow can point to internal wear and may prevent the common-rail system from building enough pressure for starting. Low or uneven return flow can also indicate an injector problem, depending on the engine design.
Prepare a Clean and Safe Work Area
Diesel injection components have very small internal clearances. Dirt that is harmless on the outside of an engine can damage an injector nozzle, control valve, or fuel pump once it enters the fuel system. Before opening any line, thoroughly clean the injector area, fuel rail, fittings, and cylinder head using approved cleaning methods.
Shut down the engine, isolate the battery where required, and allow hot components to cool. Follow the manufacturer’s procedure for relieving fuel pressure. Never loosen a high-pressure fuel line on a running engine or attempt to find a leak with your hand. High-pressure diesel fuel can penetrate skin and cause a medical emergency.
Set out clean, capped containers for removed components. Use lint-free materials only. Do not reuse exposed caps, dirty rags, or open containers that can introduce dust into the fuel system. If the equipment operates in a dusty construction yard, quarry, or industrial site, move the work to a controlled service area whenever possible.
How to Service Diesel Injectors Step by Step
The service method changes between mechanical injectors and electronic common-rail injectors. Mechanical systems may allow more component-level inspection, while modern common-rail injectors normally require bench testing and specialist calibration. In both cases, follow the engine manufacturer’s torque settings, installation sequence, and cleanliness requirements.
1. Remove the injector correctly
Disconnect electrical connectors, leak-off lines, fuel supply lines, and high-pressure lines as specified for the engine. Cap every open port immediately. Remove hold-down clamps and use the correct injector puller if the injector is seized.
Avoid prying against the cylinder head or twisting an injector with unsuitable tools. This can crack the injector body, damage the head, or leave part of the injector stuck in the bore. Severe carbon buildup may require controlled extraction and seat restoration by an experienced technician.
2. Inspect seals, seats, and fuel connections
Remove the old sealing washer and inspect the injector bore. Carbon tracking, pitting, corrosion, or an uneven seat can prevent the new seal from holding combustion pressure. Clean the seat with the correct reaming or seat-cleaning tool only when needed. Excessive cutting changes the injector’s installed height and can affect spray positioning in the combustion chamber.
Inspect high-pressure pipes for distortion, damaged flare surfaces, or cracked fittings. Many manufacturers require replacement of high-pressure lines after removal because the sealing surfaces can deform. Reusing a line against manufacturer guidance can create a leak risk at operating pressure.
3. Test the injector on approved equipment
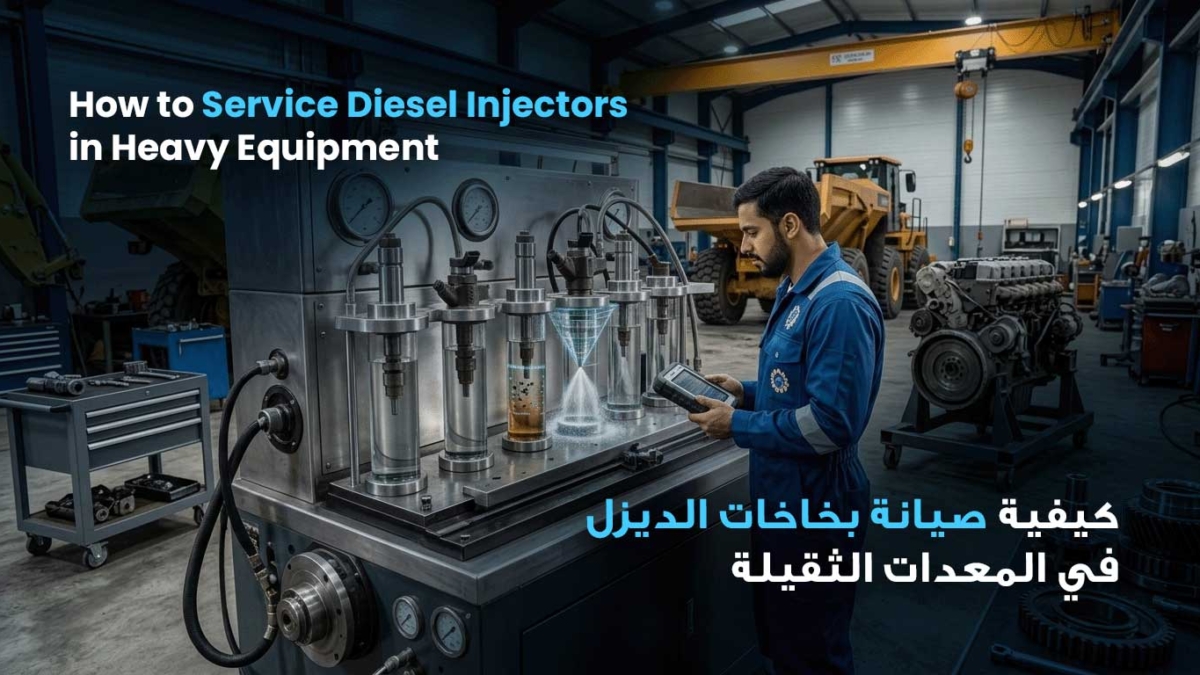
A visual check cannot confirm injector performance. The injector should be tested on a calibrated bench that can measure opening pressure, spray pattern, leakage, return flow, solenoid or piezo response, and delivered fuel quantity across multiple operating conditions.
For mechanical injectors, testing confirms pop pressure, nozzle spray quality, and leakage. For common-rail injectors, the bench evaluates performance at simulated cranking, idle, part-load, and full-load pressures. The goal is not merely to see fuel spray. It is to verify that each injector delivers the correct quantity at the correct time and returns fuel within specification.
4. Clean, repair, or replace based on test results
External cleaning alone does not repair a worn injector. If bench testing shows deposits but the injector remains within mechanical tolerance, controlled ultrasonic cleaning and approved internal cleaning procedures may restore performance. If the nozzle, valve, solenoid, needle, or internal sealing surfaces are worn, repair with quality components may be possible on serviceable injector designs.
Some electronic injectors are not economical or technically appropriate to rebuild. In those cases, replacement with a genuine or verified-quality unit is the safer decision. The trade-off is straightforward: a lower-cost injector repair that cannot hold calibration may cause repeat downtime, while a correctly tested replacement protects engine reliability.
5. Reinstall and program where required
Fit new sealing washers, O-rings, and other single-use parts specified by the manufacturer. Install the injector squarely, apply the correct clamp load, and torque fasteners in the required sequence. Over-tightening can distort the injector or damage threads. Under-tightening can cause combustion blow-by and fuel leakage.
Use new high-pressure lines when required and tighten fittings to specification. After reassembly, prime the low-pressure side of the fuel system according to the engine procedure. Avoid extended cranking, which can drain batteries, overheat starters, and create misleading fault symptoms.
Many common-rail injectors have calibration codes that must be entered into the engine control module after installation. This code allows the ECM to compensate for the individual injector’s tested flow characteristics. Skipping coding where required can lead to rough running, smoke, poor fuel economy, and fault codes even when the mechanical installation is correct.
Verify Performance After Injector Service
Run the engine at idle first and inspect carefully for fuel leaks, combustion leaks, abnormal knocking, and unstable speed. Monitor rail pressure, injector balance values, exhaust smoke, and engine temperature through the diagnostic system. Then test under a realistic load. A generator should be load-tested, while trucks and heavy equipment should be evaluated through their normal operating range.
Document the injector test results, parts installed, calibration codes, and any related fuel-system findings. This record helps identify repeat contamination, fuel quality issues, or an underlying pump problem before the same failure affects another engine.
Prevent Repeat Injector Failures
Injector life depends heavily on fuel cleanliness. Water, dust, microbial growth in storage tanks, and poor filtration are frequent causes of premature wear. Maintenance teams should maintain clean fuel storage, drain water separators, replace filters at the correct interval, and investigate recurring contamination instead of treating each injector failure as an isolated event.
For equipment with long idle periods, irregular operation, or high ambient dust exposure, fuel-system inspections may need to be more frequent than the standard service schedule. The operating environment matters. A standby generator in a clean plant room has different risks than a loader working daily in dusty conditions.
When injector symptoms affect a critical generator, truck fleet, or production asset, rapid testing is often more cost-effective than trial-and-error parts replacement. MPOM supports industrial operators with diesel pump and injector diagnostics, repair, bench testing, and field maintenance focused on returning equipment to dependable operation.
The practical goal is not just to get the engine running again. It is to restore clean combustion, protect connected components, and give your operation confidence that the next shift, delivery, or load test will not be interrupted by the same fault.